-
Fabrication and
mounting of the bat
fins.
-
Engine Cover and
hinge mounting
-
Complete re wiring
-
Fabrication
of steel windshield
frame
-
Fabrication
and construction of
Convertible
Top
-
Fabrication
of back window
-
Fabrication of Front
Beam support
structure
-
Fabrication
of Gull Wing Doors
-
Constructing
retractable
Headlights
-
Mounting and fitting
of front turn signal
lights
-
Mounting and fitting
of Gas Tank
-
Fabrication and
installation of side
scoops
-
Fabrication
of a 2"body lift
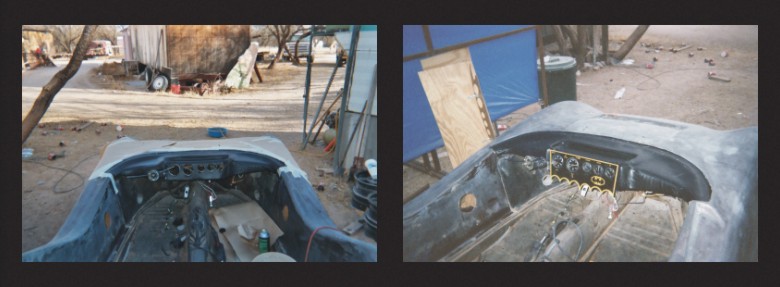
Re-wiring the Bat
Car
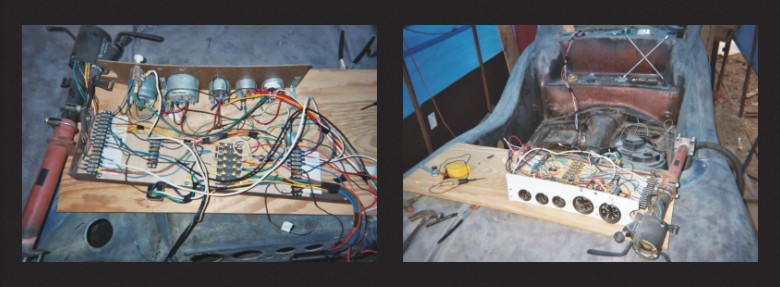
There was
no wiring in the car
when I bought it. There
was a box of
miscellaneous wiring
that was in a box of
parts with the car. I
decided to get a wiring
diagram for a Bradley 1
and start from scratch.
I made a frame from 1"
angle iron I bolted a
piece of 8"x 14" x 1/2"
birch plywood to the
frame. I mounted rows of
wire connectors to the
plywood and in the
center I mounted the
fuse box. I clamped
whole assembly to the
steering column with 1
1/2" "U" bolts.
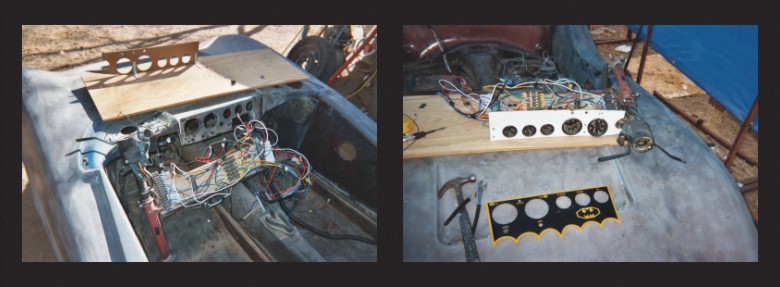
I traced
all the turn indicator
wires, headlight dimmer
switch, windshield wiper
switch and starter
ignition wires from a
1970 VW steering column.
Then I extended all of
the wiring coming out of
the ignition box with
the correct color to
match the Bradley wiring
diagram. I then
connected wires
according to the wiring
diagram with the correct
gauge and color, leaving
longer wires going to
the back of the car such
as brake, turn signals
and tail lights. I also
made a bat instrument
cover out of 1/8"
aluminum and then had it
powder coated black and
painted orange trim
around the edge.
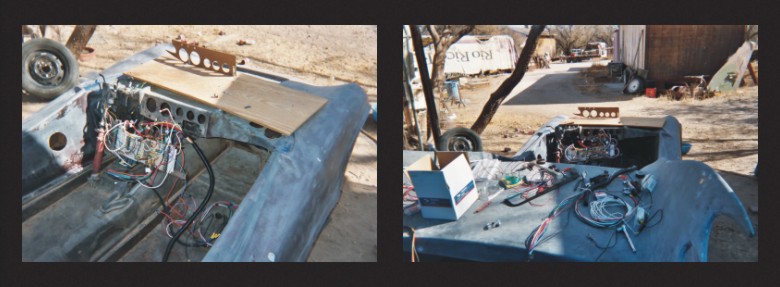
After
getting the approximate
lengths of all the
wiring going to the rear
of the car I cut them
all to length, I put a
plastic shield around
the wiring and ran it
through a hole in the
passenger side of the
wheel well and ran the
wiring to the rear
through a 2" abs pipe I
installed earlier.
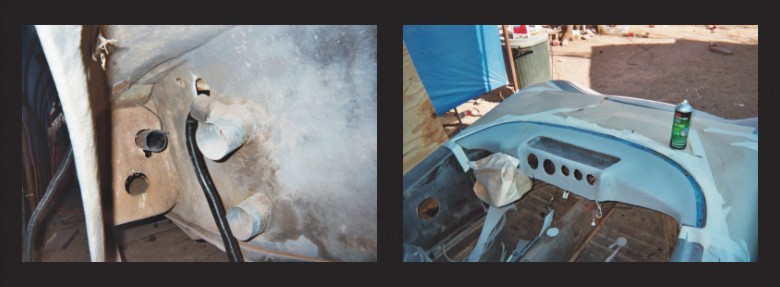
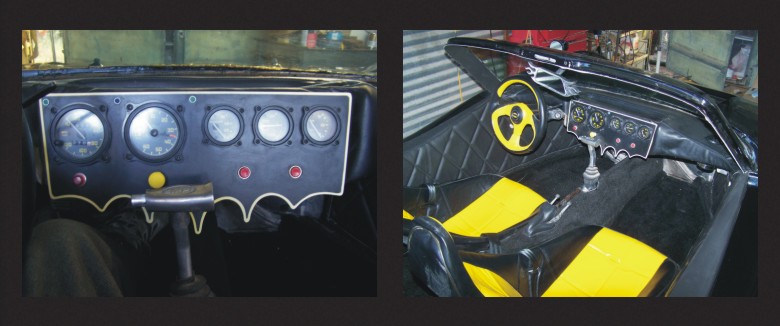
I
then used 3M spray mount
adhesive to mount the
1/4" foam padding for
the dash. I then put the
dash cover over the foam
padding using the spray
adhesive. I then mounted
my bat dash and all the
instruments. I did later
acquire a set of Bradley
II cockpit gauges that
look better than the
originals and installed
them.
Below is
what the dash and car
interior look like
today.
|
