-
Fabrication and
mounting of the bat
fins.
-
Engine Cover and
hinge mounting
-
Complete re wiring
-
Fabrication
of steel windshield
frame
-
Fabrication
and construction of
Convertible
Top
-
Fabrication
of back window
-
Fabrication of Front
Beam support
structure
-
Fabrication
of Gull Wing Doors
-
Constructing
retractable
Headlights
-
Mounting and fitting
of front turn signal
lights
-
Mounting and fitting
of Gas Tank
-
Fabrication and
installation of side
scoops
-
Fabrication of a
2"body lift
Fabrication
of
a 2" Body Lift
I found
after eight years of
building the Bat Car I
was too tall to fit in
it very well. So I
needed to lift the body
up about 2" off the
frame. So I started out
by buying a 4' X 8'
sheet of 16 gauge
steel.
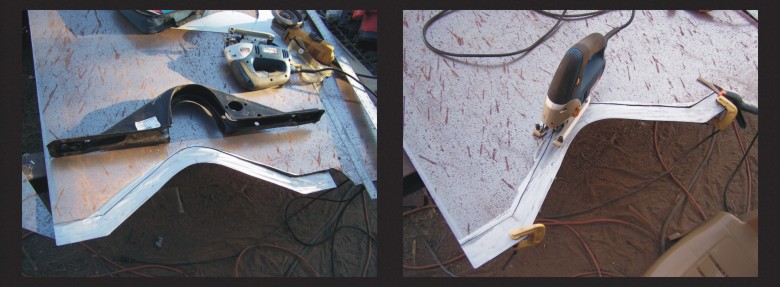
I
took the front lift
shape off a replacement
front body mount I
bought from Mid America
Motor Works. I marked it
on my steel with a
sharpie. I took my Sabre
saw and cut two
identical shapes.
I cut two
pieces 1 1/2” wide x 40”
long bent them to fit
the curved shape. I
clamped a block of 1½”
X1 ½” square block of
wood to keep everything
square and arc welded
the sheet steel where
the edges meet with 3/32
7014 welding rod.
Once I
made sure it fit the
mount, I ground all the
welds smooth and drilled
my 1/2” holes to fit the
bolt mounts.
I then
primed and painted the
front lift.
For the
back lift spacer, I took
measurements off my
spare chassis. Then I
took all the angles and
measurements and re-drew
them full size in
CorelDraw.
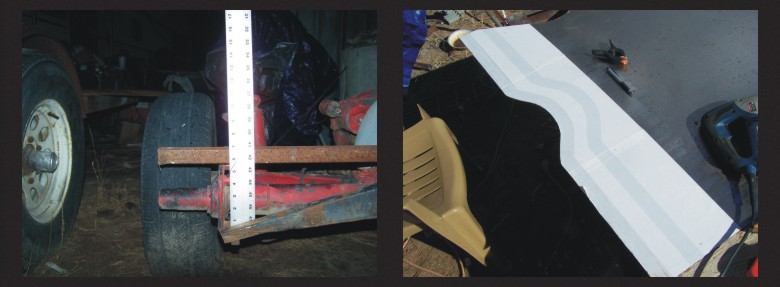
Once I
had the drawing to full
size which was 1 1/2”
wide and 2” tall, I
printed the pattern out
on paper and mounted it
down on my sheet of 16
gauge steel with 3M
spray mount adhesive.
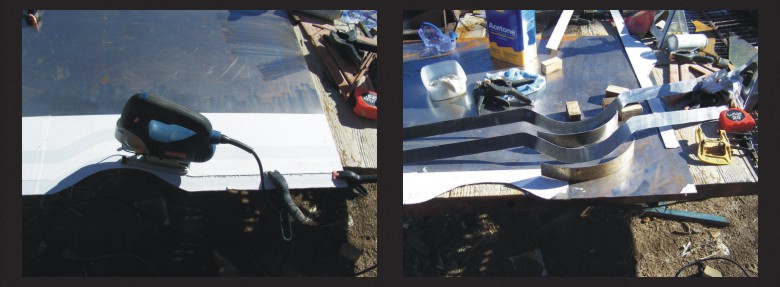
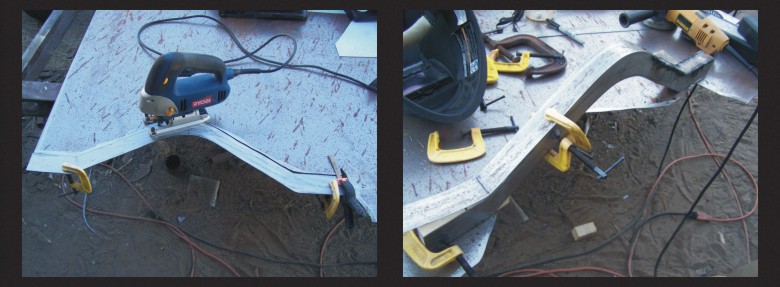
Then I
got out my saber saw and
cut along the lines on
the paper pattern. I cut
two identical pieces, a
top and a bottom. The
vertical pieces on the
curve were cut 2” wide
and bent to the correct
curvature.
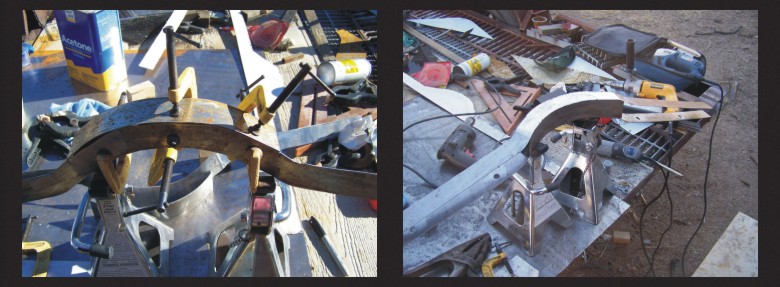
I clamped
a block of 1 ½” X 1 ½”
square block of wood to
keep everything square
and arc welded the sheet
steel where the edges
meet with 3/32 7014
welding rod. The arc
welder was set to 60
amps.
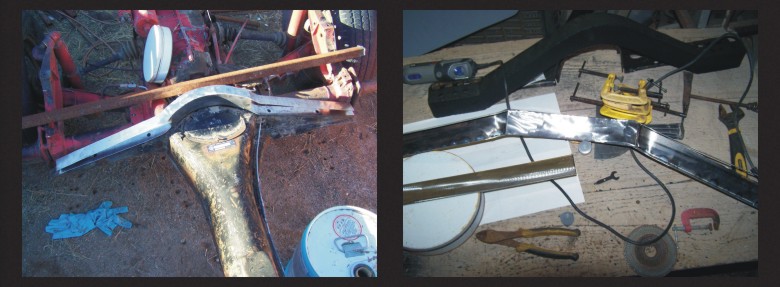
I clamped
the part to my spare VW
frame to get the correct
angle and to drill the
bolt holes. I then spot
welded the sides the get
the correct angle.
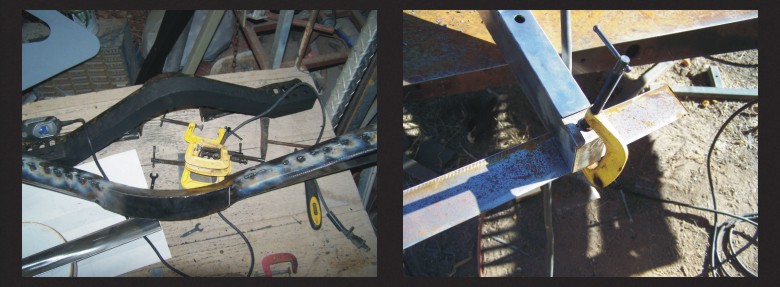
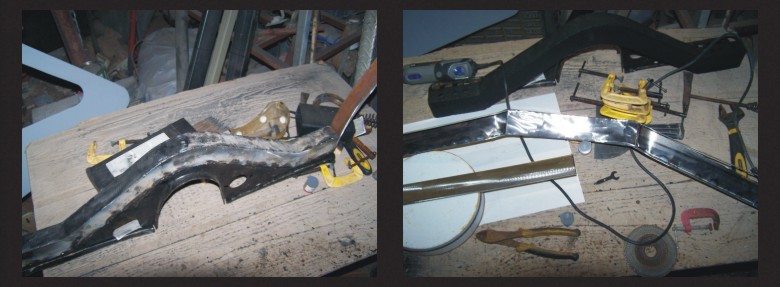
I removed
the part from the VW
frame and took it over
to my welding bench
where I finished welding
both sides, cut to size
and welded caps to the
ends.
When the
welding was complete, I
took a grinding wheel
and made it smooth.
I took
the finished part primed
it the first day and
finished with flat black
enamel the next day.
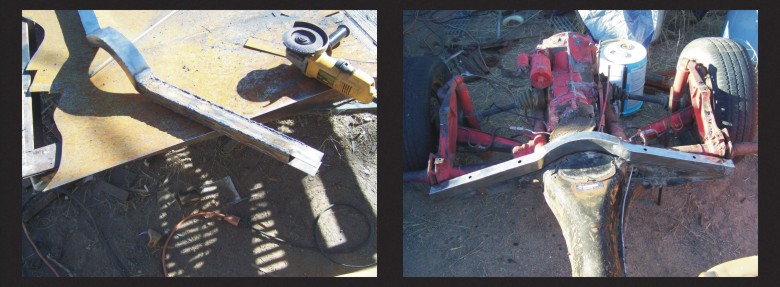
For the
sides, I bought
a 20’ piece of 1 1/2” X
2” square tubing, cut 2
pieces to 72” each. Then
I cut 5 slots in the front
inside and one cut
inside almost all the
way through. I clamped
to form the shape of the pan
and welded everything. I
ground everything
smooth, drilled holes to
match the pan and primed
and painted each side
black.

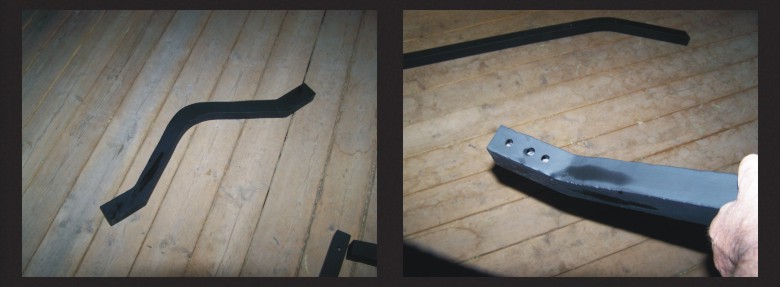
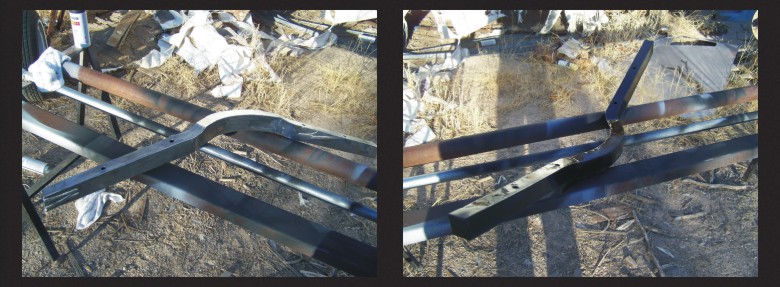
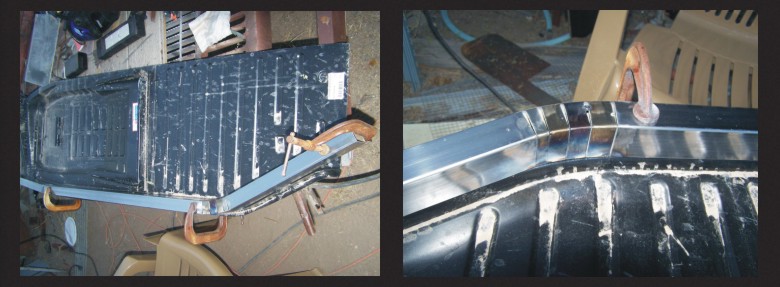
This is
what the finished lift
kit looked like before
it was installed in
the car. I did not
actually start the lift
installation until
Wednesday January 2,
2013. It is not as easy
as I thought it would
be.
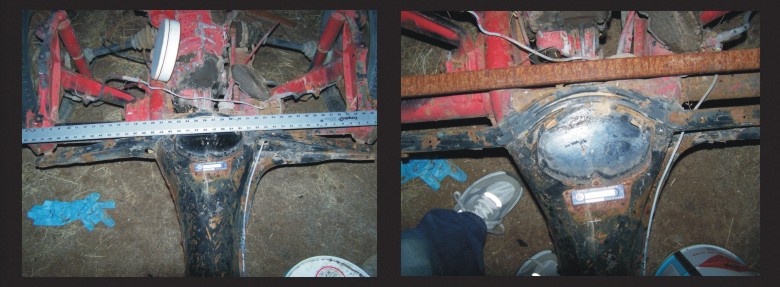
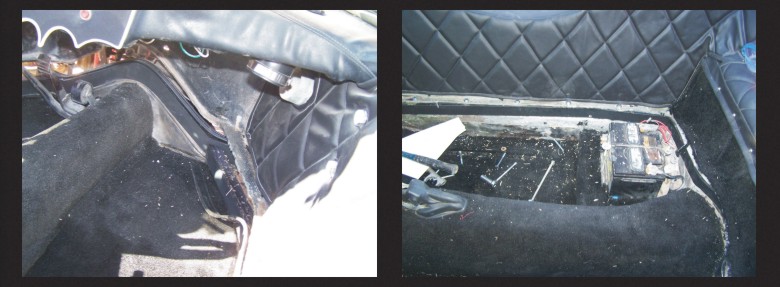
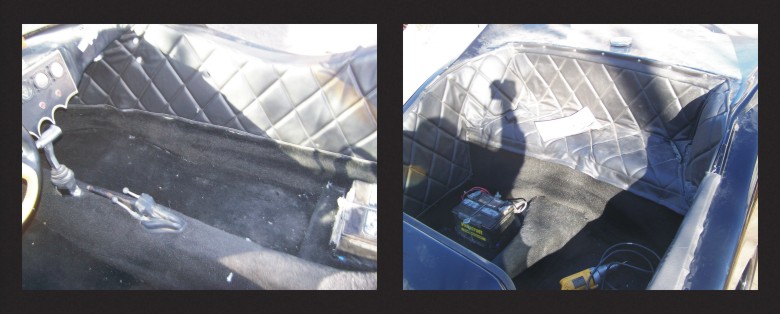
Above:
First I removed the
carpet where the body
was bolted to the pan.
There were 10 5/16
bolts on
each side of the pan 2
in front on each side
and 4 across the back.
Some bolts were missing
and some were so rusty
they broke off when I
tried to remove them.
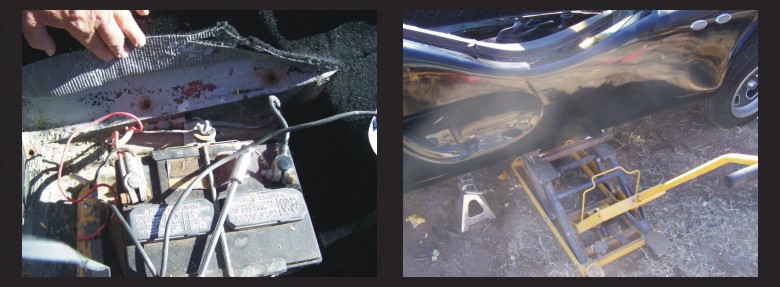
Above: I
made a special steel box
frame 16”x 8” x 6” and
put it on myHarbor
Freight ATV jack to lift
the body off the pan in
center. There is a
fiberglass plywood
structure between the
inside cockpit and outer
body about 8” wide and
36” long and 8” above
the bottom of the
outside body.
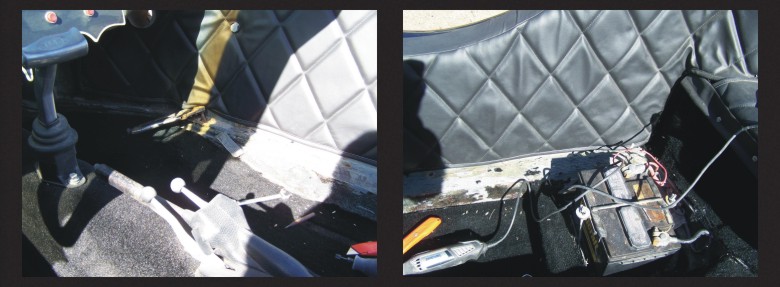
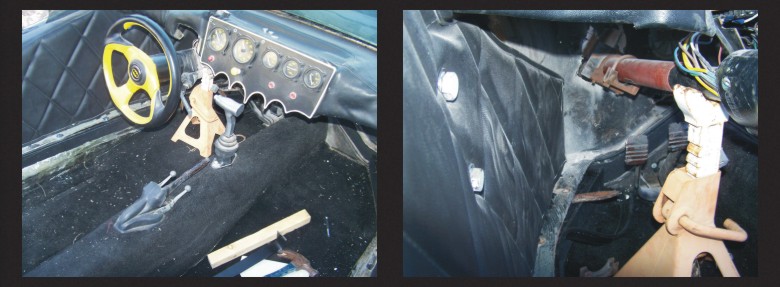
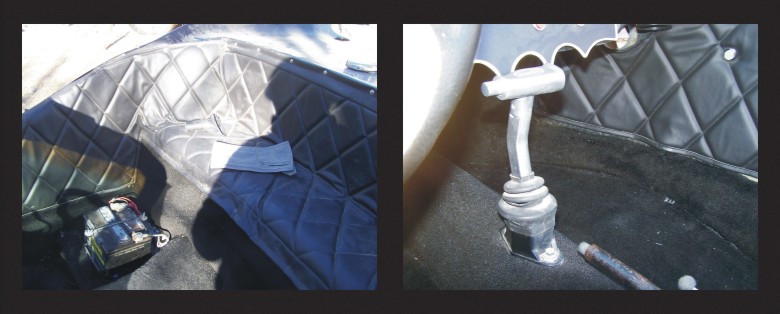
Above: I
lifted the body about 3”
off the pan. One problem
was the steering column.
I did unbolt the
steering column and
enlarged the hole in the
firewall but I didn’t
unbolt the column from
the dash. This caused
the body to move about
an inch back so the
holes in the body didn’t
line up with the holes
in the pan. I unbolted
the column from the dash
and used a come-along to
pull the body back in
line with the holes. I
did also buy a roll of
the rubber gasket to
seal the top. I re-used
the bottom rubber as it
was fine.
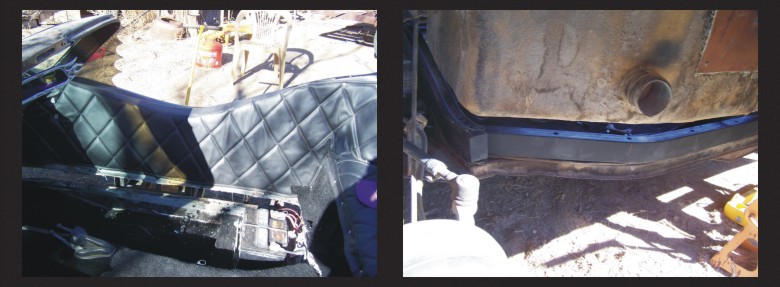
Above:
I put the front mount in
first then each side and
finally the back. I
needed 3 ½ 5/16” bolts.
I lined up the holes and
took a 3/8” drill to
clean up the holes that
were off a little. I
started bolting in the
back first and then
worked my way up to the
front tightening each
bolt as I went
forward. I did have to
pry and persuade to make
the body and pan holes
to line up after
tightening each bolt.
WOW ! This was taking a
lot longer than than I
thought.
Above: I
used a jack stand to
hold the steering column
in place. I will have to
fabricate an new bracket
as the steering column
moved one inch forward
by lifting the body 2”
up.
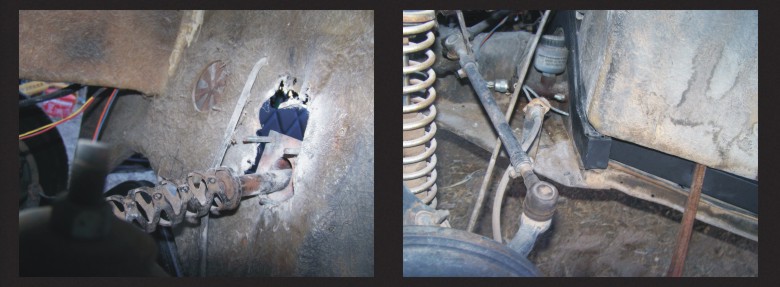
Above:
You can see the steering
column actually bent
down from its own
weight. On the right you
can see I had to use a
pry bar to help line up
the holes in the pan to
the lift and then to the
body. I didn’t finish
today so I will try to
finish Saturday
01-05-2013. This is
taking much longer than
I thought. It is also
much more work than I
thought.
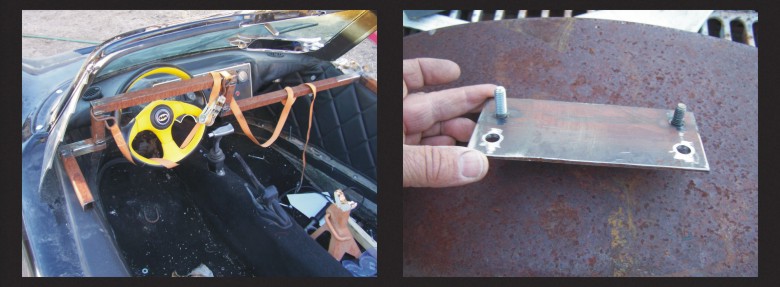
Above: I
made quick bracket to
hold the steering wheel
in place so I could get
under the drivers side
dash to measure for a
adaptor bracket to
re-attach the steering
column back to the dash.
The column had moved 1
1/8” forward after
lifting the body 2” off
the pan. Above right is
the new steering column
adaptor I made out of
1/8” steel plate.
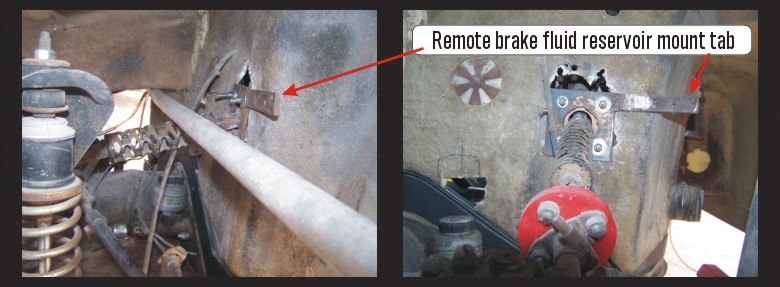
Above:
After re-attaching the
steering column, I
wedged a steel bar
between the fiberglass
center body support and
the top of the steering
column and straightened
the steering column. I
originally welded a tab
on the firewall steering
column mount to hold the
remote brake fluid
reservoir. But ended up
using a VW bus master
cylinder with the
reservoir attached.
After all
the bolts were tightened
I used the old carpet I
removed as a template
for the new by just
adding 2 1/2" to the
width and re gluing in
place and trimming any
excess from the bottom.
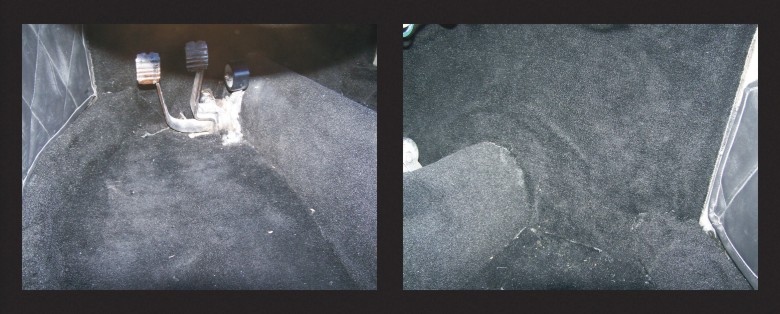
I also
installed carpet on the
firewall up front where
I had none before. It
does look a lot better
and was much easier to
get under the dash with
the 2"lift.
To be continued...
|
